Happy New Year
well all i can say is lucky i didn't tell anyone of my new years resolutions as i have broken it already on day one with creating 12 inch layout lol
This year i am going to try to work on my 8 inch albums but saw this sketch this morning 1.2.3 challenge & knew i was meant to make it so after I am finished loading up i will endeavour to pull it apart ( hate undoing all my good work LOL ) to still put into my 8 inch album that i started last year , i want to finish albums before starting another i have bout 5 unfinished albums so like to do them before i get too far in to the year ( heres hoping anyway )
so 123 challenge is
1 being a sketch, from Page maps
2 is the words which are Summer Time
3 is colours , which are white, blue and we get to pick our 3rd colour , which mine is going to be red . as im wearing a red and black shirt
after tidying up and having a clean table at midnight last year , im now going to put stuff on it again .it looked so neat this morning when i came in to craft room now has stamps, inks , punches .papers chipboards , string , hessian . nuts ohh they are for eating not on the layout sticker sheets
products i used for my layout ,
Cardstock , Kaisercraft marine , Kaisercraft white , Kaisercraft red
Pattern papers Kaisercraft Seaside.
Kaisercraft Beach Shack collectables
Kaisercraft Nautical wooden Flourish Pack i have used the lighthouse .
kaisercraft -Check in borders sticker sheet
Creative Memories Tag punch
acetate sheet that has Summer holiday which i have added TIME to
White gel pen for lines and writing journalling
Black Staz on for stamping thongs
Kaszazz stickles - Star Dust
string ,gauze , thong stamp from my stash
well thats it for now, i best go and do what i am supposed to be doing today and writing on my blog about my dt work thats heading for the shop tomorrow ,that i haven't started yet
Happy Crafting - what ever you do as long as it makes you happy, then its worth doing
.Keep Smiling
Tuesday, 31 December 2019
Tuesday, 10 December 2019
Decembers posts
hi all ,
well,the months re flying by ,hey, i dont know whats happened to the last few months ,when i thought i had a few months of just crafting yet ,here i am not finished my mini album like i thought i would by now. but as the saying goes ,family come first
In November i noticed a message from one of the craft shops requiring a person to help, at the craft alive so i thought , why not .i may be able to do something ,
so i replied the lady ,neha said she would get back to me Neha said that she was waiting on another lady to reply,
so i had an experience, that i never dreamed i would be able to do or thought would ever happen
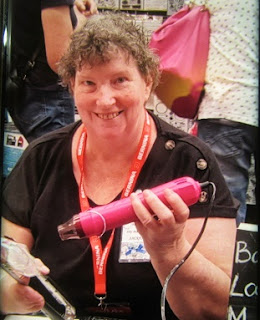
i did demonstrating. at the Logan Craft Alive
here i am at the show
a wonderful experience, a bit scary at first im usually the one looking to see what i can learn
but after nerves. had a good time .
i now have lots of catch ups with people that want to have Christmas lunch with me , so think i will leave my mini albums til after Christmas
also i have been asked if im selling my cricut cartridges ,which i have a lady that im meeting on Friday to sell to, i have lot so f dies that i haven't used in years so gonig to try and sell them somewhere some time
Seeing that i a now creating mini albums i will have lots of 12 inch Kaiser and other albums for sale ,hoping that i can sell them somewhere
but for now, i best hop off the internet as a storm is brewing outside ,
good night all
cheers
jacqui
p.s. if you are interested in buying any dies, albums you can pm me on Facebook.and in my spare days , i think i still have a couple before Christmas more after Christmas please do not hesitate to message me
thank you
Saturday, 9 November 2019
happy craft creations november 2019 anything goes
hi
hows everyone going with the heat, or fires or are you in the colder weather
here today we are sitting on 33 with my fan blaring out cool air
Novembers challenge
i commented on a beautiful picture on facebook, & someone said that it would be interesting to create a layout of card with those colours so i did , for an example
seeing i dont have much of burnt orange , at first i thought i would do mixed media, i dont do a lot of this, i mean i have the sprays/ gesso /paints to do it , i just think i also have soo much paper do it with that and its either off the floor or out of the cupboard
i went to a garage sale of my friends place and there was some flowers in a Kaiser pack, and thought , that would look good on a layout with those colours,
the layout i was thinking about then changed style lol also the photo that i thought i was going to use, i didn't find it so found another photo of me and im in orange. so my journey begun,
I haven't just used one type of papers but different company's as you will see,
PRODUCTS USED
Amy Tangerine sketchbook .- like ive had this in the cupboard for years it has 48 papers in the pack i have 8 left yaaa getting down
Creative memories, patterned papers orange
close to my heart cardstock
Kaiser - Havana Night collectables,
Kaiser gold shimmer spray
Kaiser poinsettia flower stamp,
Stamping up botanical boom leaves
Dernan Matisse high tooth white gesso (purchased at Kaiser stores )
darice wood grain embossing folder
dot stencil , ( purchased at the crafty chain )
corner rounder
acetate sheet with black circles ( purchased at spotlight )
ribbon (if you like
oval chipboard from my stash i think i bought it at a choice shop that has now closed
bling, this was a random act of kindness ( rak ) from Maureen wood we are in a group where just randomly you send someone something small to surprise the receiver, seeing i live close to Maureen, i hand deliver my stuff have a chat if shes not too busy and she knows i love bling .
now, with this particular layout i had planned to go a different way, i start things and then half way though think i should have added this , so i will tell you from the bottom up lol
my layout is 8 inch by 8 inch, im trying to down size all my 12 inch albums ,of course once i have a few , i will try to sell, i have tried before but didnt sell, so maybe like hubby says bin them.. shock horror , i will keep for next year then drop prices a bit more and see if someone has a car boot sale on at one of the scrapbooking shops
but for now , lets get started on creating a layout ..... yours can be 12 inch i dont measure too much i just think , ok, i need it smaller than my base page but will tell you measurements you can add both to yours to make them 12 inch ( my size i will put in brackets ) lets see if i can work out in my head what sizes you require .
starting with your base page stamp round the edges with your preferred stamps leaves and flowers, i always use staz - on it does not bleed if i need to colour anything in later on...... this is my preference with the large poinecnta one i stamped in the left hand corner ,then fussy cut it out and placed the amy tangerine paper over that corner to cover where you just took the flower from ,
set aside your flower we are going to spray it later
i have round cornered all my papers. and the base cardstock for something a bit different and it softens the page dont you think .
Amy tangerine yellow flowers 11 inches x 5 inches ( 7 inches x 5 ")
clear acetate 10 3/4" x 5 inches ( 7 " x 3 " )
centre both sheets so the butt in the middle one can overlap the other
creative memories patterned orange paper cut 2 . this size you can trim one down later to suit 6 1/4 x 4 1/4 (93cm x 123)
creative memories cardstock. 6x4 inch (85 x115)
now im going to tell you something that i haven't done before until today ,
thinking now i want to use my wood grain embossing folder thinking now i will have to get out my machine like make room on the table ,lets think what other way can i get my effect done., lets try this idea,
now you have to work quickly on this especially like when i have the fan going as its so hot here , now , i have got some gesso on my finger ( i hear you say noo you can use spatula or plastic knife, what ever you use for your gesso , fingers are easy to clean lol so place gesso on one side of your embossing folder , add your 4 x 6 cardstock.. close together and rub over the embossing folder you dont need it ot go though the machine this is something a bit different to do, you can wash it now or like me i just add kaiser shimmer mists to the other side of the embossing folder and my second cardstock 4 x 6 cardstock ,and again rub with your hand a few times take out and go wash your embossing folder while wet .
with the chipboard, i have placed black gesso , let dry a little not too much, and then placed in my embossing folder and added the gold shimmer mists close and rub over. while you have that shimmer mist in your grasp, spray that flower now let dry , they dont take long with the fan blaring
while this is drying you can start to assemble your layout
i also ink around all my pages
add the frangipilly flower paper of Amy tangerine or something that has a flower in bottom left hand corner, then the acetate sheet to the right remember to only add the wet glue to the dark spots not too much you dont want them seeping out although i use art glitter ( brand name not glitter) glue on everything , it dries clear, i very rarely use double sided tape anymore
so now , add our patterned paper & the dried cardstock to the page . on one you are not going to see much, depending on your chipboard size just trim to suit you might have a square chipboard or you might like to use dies
glue photo to your chipboard piece , glue to your layout ,
add bling, then your collectables, sprayed flower the centre of the corner , with flowers , i cut down pedals then shape them so they look 3 dementsial. i bend them and shape them add smaller flowers on top of larger flowers, here i can go wild, i really have to stop myself so i dont over do it. as i have to think this is going into a mini album i may not have the space to do too high. add tag (from the Kaiser havana nights collectables to mention where your photo was taken
journalling who invented that but is good later in life , you may forget ,( when i am 90 years old. long way to go yet . hahaha )
seeing im a left hander, i always do my flowers in the shape on the left hand side of the page , and to the bottom left of my page , ( in the shape of a L ) you might like to add it on the right or spreading down over the top, this is your choice,
hope you have enjoyed creating my layout , love to see if you create it
im on Facebook, jacqui mccully
Instagram happyjac11
thank you have a wonderful weekend and week
if you are in fire zones stay safe.
in heat like me , keep cool, drink lots of water , keep hydrated ,
in freezing weather keep warm
i will be next week planning to get myself wet in this heat to keep cool.
i will be back creating later in the month with more holiday photos then we get into the Christmas spirit ..
do you have your Christmas parties all booked yet, ???
cheers
jacqui
Friday, 8 November 2019
christmas cards quick and easy
Hi here i have made several cards
Kaiser jungle cardstock
Under the Gum Trees october collection
And the collectables
This is a wonderful range
until next time
have a wonderful time scrapping
jacqui
Thursday, 24 October 2019
hi everyone,
i know i havent written on here in a while ,but gosh where has September and October gone, i thought when my hubby and i came home on 7th September that i would have plenty of time to do my crafts & write on my blog , but mum had a fall that took up a lot of my time , at least i saw her every 2 days for 6 weeks something some of my friends dont have with their mums as they have passed away, so thankful that i had the extra days to spend with mum , shes ok, now i didnt have time to go out with a lot of my friends but thats ok, i know they are there when we have the time in our busy lives i may have t o make everyone a special Christmas time with them all
anyway, on one evening i went to the kaiser store and found their newest collection Under the Gum Trees, what a beautiful range can be either made as Christmas cards or layouts,
i have done this sketch layout around 10 years ago and when gonig though a album for my nieces 18th birthday thought i really love that layout, so why not create it in a Christmas range
products used
kaiser 2 sheets jungle cardstock ( you can cut out the middle of this one if you dont wish to get 2 sheets,
P2833 Fauna
P2829 Protea
P2832 Gum Leaves
ruby bling /pearls
green ribbon 1 cm wide
i bought a sticky alphabet stencil from lincraft to add Christmas to it using a white gel pen
i was asked recently to teach a class, but am not doing at this stage but thought i would see just to do with minimum of papers,with a great effective result
( 1 ) using jungle as base dont forget to cut off the bar code, ( i sometimes leave this on if i know its going to use them as a mat for your photos gives you an extra 1 cm to play with )
(2) next fussy cut out the kangaroo and large bauble of Fauna, then with remaining paper
cut two ,1.5 cm wide strips
cut two at 1 cm wide
(3) now cut out Gum Leaves, here start cutting from the bottom of the page,trim off the dotted strip, this can be used in another layout if you so desire so starting at the bottom of the page trim 7.5cm x 30cms
now trim four - 10 cms x 7.5 cms this is going to be your mats for your photos instead of cardstock make sure that one is including the pretty gum leaves from the right hand corner.the other 3 as plain black
(4) trim Protea to 5.0 cms x 30 cm
the balance of this sheet will be placed on top of your base cardstock.
trim extra jungle cardstock to 17.8 x 22.8 cms
i have inked my edges this is your choice to do or you can distress if you like the rougher approach so many choices
The fun part
starting with jungle cardstock, then place 3.5 cms from the top ,place your left over Protea sheet should be 25 cms x 30cm hessian side up
on top and bottom of this sheet add your 1.5 cm strips
measure down from top of strip down 6.8cms add gum leaves side up then below that add Protea sheet below that
place your second sheet of cardstock in the middle of the page
add black side of gum leaves central your 4 pieces these are for your photos
with those two strips of `1 cm place one vertically and one horizontally between your photos ,to make it look like a present wrapped place a bow at the top of the 4 photos
Note you can also do TWO - 4 x 6 photos as well or maybe you only have one photo you can do journalling on the other side saying when where the photo was taken
i have added foam under the kangaroo and the red bauble to give height,
with the 2 strips at the top right hand corner these are found at the bottom of your strips that you cut off
add the kaiser red pearls or bling on the bauble and along the top of the strips ive used big and small for a change use odd numbers if you re new to this 3, 5 or 7 bling . have used 7 at the top and 3 for the bauble add extra green ribbon under the bauble so it looks like its hanging
i do hope that you have enjoyed my layout and do please give it a try,
let me know how you go
have fun
cheers
jacqui mccully
p.s. i m not good with metric i hope ive given you the right measurements i prefer inches most times
good night
i know i havent written on here in a while ,but gosh where has September and October gone, i thought when my hubby and i came home on 7th September that i would have plenty of time to do my crafts & write on my blog , but mum had a fall that took up a lot of my time , at least i saw her every 2 days for 6 weeks something some of my friends dont have with their mums as they have passed away, so thankful that i had the extra days to spend with mum , shes ok, now i didnt have time to go out with a lot of my friends but thats ok, i know they are there when we have the time in our busy lives i may have t o make everyone a special Christmas time with them all
anyway, on one evening i went to the kaiser store and found their newest collection Under the Gum Trees, what a beautiful range can be either made as Christmas cards or layouts,
i have done this sketch layout around 10 years ago and when gonig though a album for my nieces 18th birthday thought i really love that layout, so why not create it in a Christmas range
products used
kaiser 2 sheets jungle cardstock ( you can cut out the middle of this one if you dont wish to get 2 sheets,
P2833 Fauna
P2829 Protea
P2832 Gum Leaves
ruby bling /pearls
green ribbon 1 cm wide
i bought a sticky alphabet stencil from lincraft to add Christmas to it using a white gel pen
i was asked recently to teach a class, but am not doing at this stage but thought i would see just to do with minimum of papers,with a great effective result
( 1 ) using jungle as base dont forget to cut off the bar code, ( i sometimes leave this on if i know its going to use them as a mat for your photos gives you an extra 1 cm to play with )
(2) next fussy cut out the kangaroo and large bauble of Fauna, then with remaining paper
cut two ,1.5 cm wide strips
cut two at 1 cm wide
(3) now cut out Gum Leaves, here start cutting from the bottom of the page,trim off the dotted strip, this can be used in another layout if you so desire so starting at the bottom of the page trim 7.5cm x 30cms
now trim four - 10 cms x 7.5 cms this is going to be your mats for your photos instead of cardstock make sure that one is including the pretty gum leaves from the right hand corner.the other 3 as plain black
(4) trim Protea to 5.0 cms x 30 cm
the balance of this sheet will be placed on top of your base cardstock.
trim extra jungle cardstock to 17.8 x 22.8 cms
i have inked my edges this is your choice to do or you can distress if you like the rougher approach so many choices
The fun part
starting with jungle cardstock, then place 3.5 cms from the top ,place your left over Protea sheet should be 25 cms x 30cm hessian side up
on top and bottom of this sheet add your 1.5 cm strips
measure down from top of strip down 6.8cms add gum leaves side up then below that add Protea sheet below that
place your second sheet of cardstock in the middle of the page
add black side of gum leaves central your 4 pieces these are for your photos
with those two strips of `1 cm place one vertically and one horizontally between your photos ,to make it look like a present wrapped place a bow at the top of the 4 photos
Note you can also do TWO - 4 x 6 photos as well or maybe you only have one photo you can do journalling on the other side saying when where the photo was taken
i have added foam under the kangaroo and the red bauble to give height,
with the 2 strips at the top right hand corner these are found at the bottom of your strips that you cut off
add the kaiser red pearls or bling on the bauble and along the top of the strips ive used big and small for a change use odd numbers if you re new to this 3, 5 or 7 bling . have used 7 at the top and 3 for the bauble add extra green ribbon under the bauble so it looks like its hanging
i do hope that you have enjoyed my layout and do please give it a try,
let me know how you go
have fun
cheers
jacqui mccully
p.s. i m not good with metric i hope ive given you the right measurements i prefer inches most times
good night
Friday, 4 October 2019
more September news
hi all,
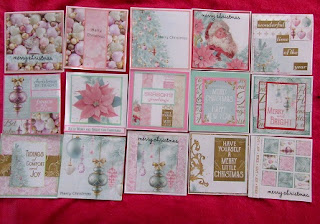
i found some Kaisers Christmas wishes in a card making magazine tht i was looking though my stash so instead of putting it away til next year , why not get them off the floor lol
ive made 15 cards with the one packet of papers supplied,
i found some Kaisers Christmas wishes in a card making magazine tht i was looking though my stash so instead of putting it away til next year , why not get them off the floor lol
ive made 15 cards with the one packet of papers supplied,
where has September gone, next month i will be writing on them all i have about 115 made up i dont need that many s some people have passed away . i usually start writing on them come November and then have 80 ready for the 1st December for posting ,then i can sit back and see whom i get cards back from which i lots of fun , i get letters in some ,
I met one lady on a coach tour in 1974, . we still write letters and recently she got emails, but she writes and says it better writing we each have all our letters and post cards over the year ,
another lady i met at my work in 1972 , i have watched and grew to know them even if not actually meeting them til the youngest was 15 some 10 years ago , so many lovely photos of all her 5 children and grand children so precious to have special friends from long ago
well, wont keep you .
have fun crafting
cheers
jacqui
Monday, 23 September 2019
September news
hi all ,
after a relaxing time away yes we came home early as we usually do but this time was good, as my mum had a fall while i was away, yes shes ok, she needs trips to the doctor every 2 days for a little while , but its all good , mum and i make it a fun day .. today we went to sunnybank community centre for lunch and they had ballroom dancing there ohh just love it , once mums arm gets a bit better i will find out how often they have it maybe a outlet for mum to go to we may have to dance together lol, last time i did that i fell and hurt my back and was not to dance for 4 years lol there was a man dancing by himself today, ohh it would have been lovely to do it they were doing my favourite dance i love. but another day, im sure . today was to be with mum
. I haven't done any more albums as i have about 4 that are half finished and want to finish them so they are not lying about
products of cards
Kaiser Silent Night
cards by coulture creations
green card stock
some collectables from the new kaiser range peppermint kisses
Art Glitter Glue
someone told me that its only 90 something days til Christmas so thought i best start making some more cards so here i have used Kaisers Silent Night range, i m not fond of this range, love the brights ,but of course i must have bought it for a reason that didnt happen so trying to sort out my room get finished projects done and make chrissie cards .
so 20 easy and quick cards to make
the cards are coulture creations a 6 105 mm x 148 mm i bought these at the crafty chain in Brisbane check out your local scrapbooking shop you get 50 cards & 50 envelopes in the pack for $15.50
with these cards i have haven't really measured a lot , i wanted to do easy i just take a whisker off the the base size to make the patterned paper a bit smaller,or have cut some patterned papers to 2 inch by 5 and half inches, and placed them ,others i have then cut again to make the 3 panels , the pictures of Santa etc are just have to cut to size. im going to add some clear shimmer to them before i post them
i thought i would look at my paints i havent used in a while maybe they are all hard ,but no i have a small amount of yellow & white so use them and they are gone . more space in the drawer now .
to glue it altogether i have used Art Glitter glue i use it for everything , joining the edges, adding it to flowers, bling, paper . i hardly use double sided tape any more only when im doing layouts when im doing stuff for the design team for Mixed Gypsys, then i use tape, as i only use what products that people can buy at her shop at home the art glitter glue is it even making cards. i just love this glue
after a relaxing time away yes we came home early as we usually do but this time was good, as my mum had a fall while i was away, yes shes ok, she needs trips to the doctor every 2 days for a little while , but its all good , mum and i make it a fun day .. today we went to sunnybank community centre for lunch and they had ballroom dancing there ohh just love it , once mums arm gets a bit better i will find out how often they have it maybe a outlet for mum to go to we may have to dance together lol, last time i did that i fell and hurt my back and was not to dance for 4 years lol there was a man dancing by himself today, ohh it would have been lovely to do it they were doing my favourite dance i love. but another day, im sure . today was to be with mum
. I haven't done any more albums as i have about 4 that are half finished and want to finish them so they are not lying about
products of cards
Kaiser Silent Night
cards by coulture creations
green card stock
some collectables from the new kaiser range peppermint kisses
Art Glitter Glue
someone told me that its only 90 something days til Christmas so thought i best start making some more cards so here i have used Kaisers Silent Night range, i m not fond of this range, love the brights ,but of course i must have bought it for a reason that didnt happen so trying to sort out my room get finished projects done and make chrissie cards .
so 20 easy and quick cards to make
the cards are coulture creations a 6 105 mm x 148 mm i bought these at the crafty chain in Brisbane check out your local scrapbooking shop you get 50 cards & 50 envelopes in the pack for $15.50
with these cards i have haven't really measured a lot , i wanted to do easy i just take a whisker off the the base size to make the patterned paper a bit smaller,or have cut some patterned papers to 2 inch by 5 and half inches, and placed them ,others i have then cut again to make the 3 panels , the pictures of Santa etc are just have to cut to size. im going to add some clear shimmer to them before i post them
my next project
i loved creating this to put my photos in ,but now am wanting to put my Christmas cards into lol
i have used my favourite papers of all time Kaiser Wandering Ivy, of course its blue i just love anything blue
i thought i would look at my paints i havent used in a while maybe they are all hard ,but no i have a small amount of yellow & white so use them and they are gone . more space in the drawer now .
to glue it altogether i have used Art Glitter glue i use it for everything , joining the edges, adding it to flowers, bling, paper . i hardly use double sided tape any more only when im doing layouts when im doing stuff for the design team for Mixed Gypsys, then i use tape, as i only use what products that people can buy at her shop at home the art glitter glue is it even making cards. i just love this glue
anyway, i best head off to bed, good night all ,
happy crafting
cheers
jacqui mccully
Thursday, 29 August 2019
just posting
hi all
feel free to browse though i do write a manuscript sometimes so grab a coffee hehe
i created my layouts etc, i often think , i should just write the basic , but wheres the fun in that i think, and was mentioned last year by a friend that it makes it me by writing what im feeling at the time im creating
there will be no layouts etc for another 11 days as im away relaxing . and hubby says its my time to get away from crafting & taking people to hospital and drs and just relax, and i find that im refreshed again to start again when i return
you can find on the right hand side years click on it and it will open to my challenges ive done over the years starting in 2014, my friend and i used to do 25 challenges a month ,but i have slowed down a lot since then with family commitments. & just do a few here and there I mostly concentrate now on mini albums but still love to create my layouts
good night all
have a happy crafting time
cheers
jacqui
Sunday, 18 August 2019
happy craft august challenge
hi ,
ive been doing some smaller layouts 8 x 8 inch to fit into my heartfelt creations mini albums so much fun to create
i bought several years ago scrapmatts chipboard kit for a off the page project, but now upon doing mini albums & wanting to get lots of photos into my mini albums i have to start thinking outside the box so to speak ive been going though my drawers and finding lots of treasures that i have bought over the years just waiting for that opportune moment for that special photo . so now have thought, just use them .im getting older i still want to have the enjoyment of using the stuff that i have bought,
i took out the off the page kit of scrapmatts and painted it with black gesso. there are 3 parts to the kits , so means 3 layouts for me yaaa.
i then have got my photos and added and cut them to suit the sections
so here are 2 of the pages ive created ,
this one is using Kaiser peachy collection i have cut out the flowers something i dont do but needed some flowers to add to the top of the circle
this one below i made in late july its using Kaiser paradise found background papers & Kaiser black cardstock
i only have the circle to go now have to think on that one was thinking of doing the same technique as above ,but forgot to mark out the where the markings were so may think of another idea with the spare one
hope this inspires you to try something different
until next time have a happy crafting week
jacqui mccully
Sunday, 4 August 2019
1 2 3 AUGUST CHALLENGE
123 august challenge
I see another another great month of 1 2 3 challenge
the sketch from Page Maps , 2 words - Brilliant Idea, as soon as i saw the words i knew the photos i wanted to use , and 3 colours blue , yellow and brown
When we go away we always go to the same places, as my hubby has relatives that live in new south wales as he did as a child
he fishes as his father before him & when they had too many fish would sell it at the Brunswick Heads fish Co- C obut that was a long time ago now, Now we just buy fish from the fish co op that was until 2 years ago ,when it closed , what to become of this there were rumors to change it to a car park, others wanted the fish co op to come back but it still sits idle
but in feb as we walked along the road some changes have been made its been painted i went to take a photo and a lady came by and started chatting telling me that its been painted for the series of Sea Change ( or movie they had not decided yet if to go for t.v. series and to watch it when it comes out as then you will see , around about now it should be coming out ,
so my layout today includes the Brilliant Idea as my words as someone had the brilliant idea to make this a movie set , we may even get to see it in action when we go away later on this month, will keep you posted lol
i always think ,im going to use different papers ,but always come back to Kaiser products , as i have thousands, im sure .
Kaiser Chocolate cardstock . CD109.
Kiaser film strip from happy snaps collectables
Kaiser Beach Shack
Kaiser sandy toes
kaiser wooden anchors & wheels
kaiser blue bling
Kaiser the fish are from another of kaiser 6 inch pad ( i think deep sea)
yellow dew drop brilliance yellowBD-000-011
gauze from my stash
my journaling says
WHAT A BRILLIANT IDEA ,
the fishing village of Brunswick Heads, that used to be a thriving with fishing trawlers, now sat idle for 2 years, has now been transformed into a movie called SEA CHANGE,
such a brilliant idea to make this sleepy town come to life again
today i have cut my papers into 3 the sun was a sticker on a sheet ,wondering i would ever use so cut of part of it to make a circle coloured it with Dew Drop Brilliance yellow, i had a stencil out with splashes , so i have made the rays with
matted the photos with chocolate cardstock , and matted my journalling as well.
i have placed my gauze over the top of my brown cardstock
the filmstrip and camera are out of the happy snaps collectables,
the blue and yellow arrows are form the sticker sheet of Happy Snaps Kaiser collection and the same with the yellow scalloped edging
thanks for this great challenge , seeing ive done this in 12 inch by 12 inch , now time to pull apart and re do it , so i can then place it into my 8 inch album as im now creating in 8 inch albums now so will do any challenges in the proper size of 12 inch ,for entries
after doing so , i realized ,that ive done all my 8 inch pages of my album and needed a 5 inch by 8 inch not to be out done a snip here and there and it now fits into my heartfelt creations album
thank you soo much had fun creating my 12 inch page anyway
until next month
have a wonderful month creating
cheers
jacqui mccully
Saturday, 27 July 2019
happy craft july 2019 challenge
anything goes July challenge
last night I got out my last sheet of Velvet Crush, its black and white flowers on it, but of course, I want my page mostly in the red as my blouse is in black red and white
I also have Shaken not Stirred papers as well as 6-inch book
As i haven't put away my paradise found collectibles, some of them may come in handy, I thought
Kaiser Red Mists I have painted over the velvet crush papers as the mister is clogged up, but I can paint things on still so while I'm having tea, I put the fan on to dry my paper I do this a lot when I don't want to wait overnight or hours I just want to get the layout done so fan always comes in handy,
I have put my 6 small photos onto striped shaken not stirred paper and cut to size,
black cardstock is my base, my paper size is 21.5 (8-1/2 inches) x 29cms (11-1/2 inches )
i then cut my now red and black paper to half an inch smaller than the base cardstock.
mat 6 inches shaken not stirred paper and add 3 red bling to the top right-hand corner,
fussy cut Ebony & Ivy paper flowers big and small ones to add to each other. add bling on top right-hand corner, curl up flowers to give depth.
paradise found is from sticker sheets and collectables get out desirable flowers and leaves, and tags
Kaiser Wooden Flourishes - smear gesso over the flourish when dry, write on your message
Celeb8 chipboards are raw, but i have painted them in red Kaiser mists and covered with glossy accents not to much just smeared that over the top with my finger.
my friend Robyn as children were joined at the hips other friends used to say, everywhere Robyn was you would find me. we met in grade 2 in 1960 but first photos are in 1962, We went right through primary and high school and went to the ballroom dancing until she got engaged, something change, and I hardly saw her, we met again briefly in 1991, 2006 for school reunions and this year have met again 2019. the next school reunion is in 2031 but, Robyn says that she won't leave it that long this time, of course, we are both busy in our own lives, and she does not live in Brisbane so that may be difficult to meet, maybe meeting every 6 -12 months might work will see.
hope you like and get inspired.
until next time have a wonderful weekend
cheers
Jacqui McCully
Monday, 22 July 2019
Happy craft creations july 2019 Sketch challenge
hello all,
how has your day been ???
Today I thought I would try Happy Craft Creations July Sketch challenge.
On the 9th August 2015, I went to my friend's Alison Bevis's Workshop Wonders it where Alison gets 4 lovely teachers to teach a 90 minute class though out the day, we start at 9am & finish at 5 pm and we get morning tea, lunch & afternoon tea included in the price for the day
I always take my camera as on Alison's w.w. she always has a theme. this one being Blue & winter .so I made snowflakes to add to my shirt an a name tag in blue that day I had the pleasure of sitting next to Janet Bott, from The Resin Rainbow we had planned it hee he.
I have in my photos Alison Bevis, Bec Beattie, Kaye Grieves. Janet Bott and me
This was a 12-inch layout but was falling apart, so decided to pull it all apart and revamp,
These days I'm using 8-inch x 8 inches to make my layouts, it's far easier to carry them when I need to show people my work.
So got to thinking today I will get out my white gesso, but alas i go into the drawer and find 2 black gessos ohh dear what to use now, I had a plan, I don't want to go out & buy the gesso lets see what else is in this drawer , umm Glitter Snow, that might work I've had that in the drawer for at least 5 years might be hard LOl its a bit hard but good enough to spread through my stencil yaaa, so I want this finished so turn on fan while I have lunch so it can dry ,
after lunch
the patterned snowflake papers I have then just cut up to make tags all 32 of them as I'm doing a double layout, ( who decided to do a double layout . didn't think of hand cutting out 32 tags & inking them all did! ! ! ! I LOL )
I've inked with Tim Holtz Distress inks Salty Ocean, I love this colour and use it a lot
I have used Kaiser Blueberry cardstock
t snowflakes stencil
dot stencil
Cloud 9 Fiskars blue paper for the backing paper of photos
the happy days was done in 2015 so not sure what I did to achieve that it's on chipboards, I love chipboards,
I have cut out some snowflakes from the blue patterned paper as it was a class i don't know the name of it sorry.(I don't believe its not Kaisers LOL)
just as an added feature I've got out the dot stencil that I bought at The Crafty Chain and dabbed a bit of the glitter snow over it
the alphabet date is from Kmart
one of the photos I have popped up using Collall 3 D decoupage glue for a bit of height
I had fun creating this today & its another layout off the floor that has been revamped
Thank You Happy Craft Challenge for this wonderful sketch
until next time
have fun creating
cheers
Jacqui McCully
Sunday, 7 July 2019
123 july reveal challenge 2019.
1.2.3. reveal july challenge
hi everyone
what a cold wet day it is today here in Logan qld
when this challenge said it was going to have a gap year, i thought , what am i to do , as this is one of my favourite challenges to get me out of my comfort zones , after a few months i thought , maybe i too needed a gap year to reflect on my year & do something different for a while ,which i found 8 inch mini albums . i still get the enjoyment of doing layouts but in a smaller version which i really love still of course i can enter them into anything goes challenges, but not ones that require 12 inch pages ,
After having a 18 month break , its lovely to see this challenge back again
For the month of july we have ( 1 ) a sketch love their sketches, i always know they will turn out great,
(2) two words THIS MOMENT
(3) 3 colours
my products ive used today are
KAISER - 2 sheets ,cardstock , steele CD 105
1/4 sheet of black scrap cardstock .
1 Garden Arabesque P398 fountain , patterned papers , this is a very old range of Kaisers
Kaiser Violet crush patterned sticker sheet - butterflies ,
BoBunny, sticker sheet , beautiful dreamer #item 19403345
Inks Kaiser IP732 orchid ink
Kaiser Alpha letters lower case # 3
Kaiser black cardstock
Kaiser purple bling
TIm Holtz -dusty concord
wilted violet
seedless preserves
Staz-on jet black
Embossing folder & Die are from cardmaking magazine by chloe ( out this month)
Stamps, Beccys Place - Orchid
water brush
Punch EK large 2.25 scallop punch
flowers from stash
Dina Wakley Black media gesso
magicals - prima donna purple
doilies white
My thoughts on this challenge ,
after seeing this challenge the other day, i thought why not give it a try, but im in the middle of holiday album . this is where i start something & then start another thing ,before i know it i have 10 things started and nothing finished, today is going to be different , after me starting yet again to change my table around yet again lol
Getting my Garden Arabesque i cut the middle out at 10 inches, (25.4) on all four sides, the middle is going to be punched later.
next cut my steel cardstock at 11 inches, ( 28cms ) glue both together .
I have distress the edges of the grey and have inked it something i have a habit of doing lately with anything i distress or even on straight edges if i dont want to add a mat .
Ek scallop punch with the paper you put aside
Kaiser garden arabesque - cut out 6
punch out middles of 3 doilies,
cut 2 grey steel cardstock
when you punch this out be very careful as the doilies are very fragile and may tear, lucky mine didn't, i have a misti that i place my stamps into , so placed the doilies in and stamped and then coloured i also used the scalloped punch then cut out the scallop part & fuzzy cut the scallops off ,then is a circle on some
while i have my water brush i get the chosen butterflies from the violet crush sticker sheet and colour them in also.
i havent measured anything with the where i placed the scallops
i have loads of scrap black cardstock placed my 2 photos and then just cut around it
I wasnt going to colour the alpha chipboards , but then thinking i have all these wonderful magicals just sitting in the cupboard. so then got my gesso and with a paint brush painted all the cardstock as well as the alphas
while i went for tea, i put the fan on so it would dry while i was away so i can come back straight away & start again
i then added the magicals which only take a few mins to dry.
added bling to die cut flowers and added my flowers and the butterflies to each
thank you once again 123 challenge i had fun creating this layout today .
until next time
have a happy crafting time
cheers
Jacqui McCully
'
Friday, 28 June 2019
#happycraftchallengeteambluejune2019
hi everyone
last week i went to a meet and greet of my primary school what a wonderful event to meet people 50 plus years since leaving primary, as usual i took lots of photos but when you have 100 people i didn't get to ask am i allowed to place your photo up in my challenges or facebook, but i happened to ask one family and they said it would be ok to put out here
Some people travelled from Thursday Island, Cairns, Melbourne, Gympie, Murwillumbah and many other areas of Gold Coast ,Sunshine Coast and surrounding areas , and Brisbane people All said it was worth the trip to come and will be back ,maybe not to every time , but once or twice a year when able
at the June craft show i picked up some celeb 8 Brave and Bold papers , i dont often do boys pages , mostly girls and beach themes at the beach you dont have to ask permission
but thought at the time might be fun to create something with boys papers, even though at the time i wasnt sure what .
when i saw this family of men, the papers popped in and i thought yes of course , and so my journey begun of creating my page
products used , celebr8 bold and brave , pp3905
celebr8 pp 3906
pp3901
Kaiser cogs stamp
creative stamping stamps car, road,
Stazon ink, jet black
ranger distress mustard seed for water colour effect on car
Im not into fussy cutting but have made an exception this time and have cut out the arrows ,clock, fun times, the Bold and Brave is off the bottom of the page
and the caption you wouldn't want to meet any of thes crew on a dark night, the mens sister wrote and took the photo
i have stamped the car, road from a card making stamps wit black staz on ink and then coloured it with mustard seed distress ink
The cogs are Kaiser cogs,
i have cut out the clock distressed all of the the edges and of course i have to ink the edges of everything
i have matted my photo and cut out the words loyalty, sign
my page is a new size for me 11 and half by 8 and half .
I find joy in creating layouts of people that i have met and will take my album to all meet and greets for all those who didn't get to meet people ,so they can se what people look like now, its funny ,that i still picture them as children and not grown up the ones i haven't seen for 50 years ,
i had fun creating this page can not wait to get started on the next 60 photos that i took at the school Meet and Greet before the next Meet and Greet comes around in a few months time The organisers are going to do these every 3 -4 months so i will have new ( maybe ) layouts to create to keep me happy
until next time happy crafting
cheers
jacqui mccully
Tuesday, 11 June 2019
happy craft challenge june dt
JUNE GUEST DESIGN TEAM
Hi, welcome to my blog ,
i have the honour of being your June Guest designer, for Happy Craft Creations Challenge What a Privilege, Thank You Megan Flynn
I have a Sketch & Mood Board so have created a layout as well as a card ,
last week i bought Creative Stamping magazine ,which they supply Simply Made Crafts A4 stamp set, Love & laughter. This month had beautiful flowers and leaves, birds, swans, so got to thinking what if i stamped instead of using Kaiser papers, and my journey begun
Here are the products i used to create my 8 x 8 inch layout
Products,
jet black Stazon ink
Kaiser Smooth white cardstock
simply Made Crafts stamps flowers and leaves
Novita paper collection - Floral Watercolour Stickers ( these can be bought at the Crafty Chain at Rochedale in Brisbane )
Echo Park - Mango small Dots papers item #DTSP10012
Distress Inks,
mustard seed
spiced marmalade
carved pumpkin
ripe persimmon
lucky clover
the word . Happy Hour I printed on my computer & the journalling not my strong point
Close to my Heart clear glitter pen
Waterbrush
I have used Kaiser smooth white cardstock & have stamped with Jet Black StazOn ink, this ink is great for those wanting to colour in as it does not bleed, there are many colours, but i love the black one only
Did you know that with your StazOn that you can stamp on your photos ? ? yes , it works i put some leaves on in the corner so the background doesn't look out of place
Colouring in is so much fun, relaxing and not just for kids us too.
So going with the sketch, i just stamp all what needs to be done, then the fun begins with the colouring it ,
This is the colour the colour combo into the mix ( see right) this is a colour i dont use very often so finding something that matched i thought would be a problem, but then remembered i had this orange shirt on when i went away on our annual break
i have a Couture Creations craft mat that i have glued to the side of my mat , so when i want to colour its there ready, so i have just got my distress ink pad and just dab a bit on ( you dont need much ) then with my water brush just start painting it on the page
ive inked around the outside of the page to give it depth, again using distress inks ,
i love anything glitter as well, and have added some clear glitter to some of the flowers its never complete ,unless im adding ink to the edges or glitter or bling
Hope you are inspired by my page today & give this challenge a go .
until next time
Happy Crafting ...
Card
i have my card 6 x 12 inches , score in half and make the fold at the top of the card .
I have a corner rounder which i love ( when i worked the machine was called a round corner machine and it seems so funny , that in the crafting world the name has been turned around )
so i have rounded the 4 corners
I have a die cutting machine with Kaiser circles dies. I have cut a Kaiser Class of '87 paper collection ( this is a very old collection of papers )
while still off the card , i have dotted around my circle with my white gel pen , and inked with green Dew Drop Brilliance Gamma Green around the edge
the little fairy was on a4 sheets and as i walked by at the cheap shop, i thought she looked so cute wouldn't it be nice on card ( of course cutting out is not my strong point ) however i managed to get her all cut out
I have placed Collall Silconen 3D Decoupage under her to add height this takes a bit longer to dry, but i love it and use it all the time instead of foam dots which you can use In brisbane you can purchase this at The Crafty Chain. or ask at your local craft store
i own a misti & love it for when im creating lots of cards like at christmas or for special cards . The stamps dont move, so if it doesn't go as dark you desire you can go over it and know that its going to go in the same place as before
with this in mind i have placed my leaves and flower & butterfly combo around the card and stamped with stazons ink
Then have coloured in after alldry, i have assembled the fairy onto the kaiser paper and added bling to the butterflies
I have also added Close to my heart clear glitter pen to the wings of the fairy and the centre of small flower and all of the large flower
Can not wait to see your creations for the june mood board and the sketch challenge
Happy crafting
Jacqui McCully
Sunday, 9 June 2019
happy craft challenge
# happy craft challenge june 2019.
on thursday i went to the brisbane craft show where Quentin Redshaw showed us a new technique using Aussie Boom Gel.
I had seen it last time at another show but looked interesting and thought i would do next time , so on thursday i knew the colours i wanted to work with and had the idea before the show what i was about to do with it once it dried after 3 days ,
It was a 5 x 7 canvas, so taking the staples out and cutting it to the size i needed
I have used , Kaiser Pink Gelato sticker sheet and coloured it with Ranger Distress Oxide blueprint sketch inks to make them blue i then proceeded to add purple glitter washi tape to the mix, I think its Kaisers as well,
About 4 years ago, my friend Nicole Penman cut out lots of papers for me as i dont do fussy cutting and cut all these kaiser shells out for me , so about time i use some more and the turtle is from Kaiser Deep Sea, a beautiful collection to say the least . I have coloured and inked some of the edges of the shells and have added some glossy accents to the bubbles
the Great day out is from Scrapmatts just love their chipboards
the cardstock is white cricut and i have just bought a kit that has Kaiser waves stencil,
here i have got some wet ones and sprayed my Kaiser Denim, Kaiser White Dyslusions London blue and crushed grape an smeared over the stencil to create a wavy effect i have gone over again in different spots to give the idea of waves moving ,
my photo is 3 x 4 inch.
Hope you like it and inspired to give it a go
until next time have a great week
cheers
jacqui mccully
on thursday i went to the brisbane craft show where Quentin Redshaw showed us a new technique using Aussie Boom Gel.
I had seen it last time at another show but looked interesting and thought i would do next time , so on thursday i knew the colours i wanted to work with and had the idea before the show what i was about to do with it once it dried after 3 days ,
It was a 5 x 7 canvas, so taking the staples out and cutting it to the size i needed
I have used , Kaiser Pink Gelato sticker sheet and coloured it with Ranger Distress Oxide blueprint sketch inks to make them blue i then proceeded to add purple glitter washi tape to the mix, I think its Kaisers as well,
About 4 years ago, my friend Nicole Penman cut out lots of papers for me as i dont do fussy cutting and cut all these kaiser shells out for me , so about time i use some more and the turtle is from Kaiser Deep Sea, a beautiful collection to say the least . I have coloured and inked some of the edges of the shells and have added some glossy accents to the bubbles
the Great day out is from Scrapmatts just love their chipboards
the cardstock is white cricut and i have just bought a kit that has Kaiser waves stencil,
here i have got some wet ones and sprayed my Kaiser Denim, Kaiser White Dyslusions London blue and crushed grape an smeared over the stencil to create a wavy effect i have gone over again in different spots to give the idea of waves moving ,
my photo is 3 x 4 inch.
Hope you like it and inspired to give it a go
until next time have a great week
cheers
jacqui mccully
happy craft challenge
#happycraftchallengesuperteamblue2019
#happycraftchallenge2019
this months challenge is to use Embossing folders, Arches and the mood board colours,
I have used a Kaiser circle die cut and cut it in half to create 2 arches i have placed Kaiser Basecoat (blue ) bricks under the arches and also with some Kaiser acacate placed under the arches as well for added depth, and left one of the bast coat arches blank,
my embossing folders, one is a A4 size clocks that i purchased many years ago shortly after i bought the ebosser, this is a beautiful machine as its no winding electric , and is so easy for me to use,
my layout today is 8 inches by 8 inches, you will find
that most of my layouts this year will be this size as the 12 x 12 albums are taking over my craft and lounge room, so need smaller albums now to get them to fit this size is so easy to work with
i have drawn a 7.5 inch white gel pen and written about the story of the pictures, it reads
My Great Uncle Reg, built this church, and he and my Great Aunty Rose were the first couple to get married in it , the village was know as Sherwin Flats , until it took on the name of Tarago meaning country in 1884.
i have place 3 photos on the page ,and the word discover is from Scrapmatts chipboards, i just love their chipboards
until next time
have a fun weekend
cheers
jacqui mccully
Sunday, 19 May 2019
8 inch Heartfelt Creations mini album
hi everyone
I had so much fun with the new heartfelt creations 8 inch insta album . that im wanting to do another ( when i return from my break )
i have used 2 packets of Couture Creations paper packets. it comes with chipboards ,acacate sheet plus lots of lovely papers , im not really into apricot, but the word AUSTRALIA got me in , me thinking that the papers and maps would be of Australia , how wrong was i lol but it beautiful papers to say the least
the Products i used
from Auzz Trinkets & Kraft ( Neha is the owner) the 8 inch album ( you can buy the whole kit that includes papers. stamps and dies ( not what i have used )
Couture Creations paper kits from The Crafty Chain
chipboards Scrapmatts and Couture Creations
somethings like hat is from my stash
the inks i used are from Mixed Gypsys Scrapbooking and Craft Distress Oxides blue
other inks dew drop brilliance gold ,
Until next time have fun scrapping
cheers
jacqui
Subscribe to:
Posts (Atom)